
Disclaimer: The following information is to be used for general guidance only. Any attempt to perform DIY rifle camo is solely at your own risk. Spray painting is inherently hazardous to your health; take all safety precautions before attempting this project. Paint can irreversibly change or damage certain items, so proceed with caution. Be sure that all firearms are safe and unloaded; all firearms safety rules apply.
Hydro-dipped rifle camo patterns are a fashionable look these days, but this process can get expensive and it’s not practical on larger items. If sending your gear out to a professional coating service will be too tough on your wallet and the extensive turnaround time too excruciating, there is another option. A much less expensive and immediate way to achieve a similar effect is to paint the camouflage yourself, by way of rattle can.
There are a number of reasons why one would want to cover their gear in camouflage, ranging from survival purposes to aesthetics. Maybe your gun’s original finish was ruined and you need to cover it up to prevent corrosion. Or you want to break up the lines on a storage container so it isn’t so blatantly visible. Heck, you can even go all out and camouflage your truck (you’ll never lose it at the mall, but the woods might get tricky). No matter the reason, figuring out how to pull off a good rifle camo paint job can be a bit overwhelming if you don’t know certain specifics. This is why we’re here, to provide you with said specifics.
Sure, spray paint is not nearly as durable as other coating types. But it can be reapplied quickly and cheaply. This makes seasonal rifle camo changes more practical. There are many different ways to go about doing this; this guide shows you one method and touches on a few suggestions that can lead you to others. Do your research and have at it. Don’t be too intimidated to take on a project like this; it’s only paint after all. We’ve even included a sidebar in case you made a mistake and want to start over. Painting a scheme on your gear can be a rewarding experience as long as you know the basics.
What You’ll Need For This Tutorial:
- Spray paint
- Quality masking tape
- A hobby knife or scissors
- Various pattern-making materials (optional)
- Marker
- Steel wool (optional)
- Lint-free cloth
- Automotive brake cleaner or acetone
- Surgical gloves
- Mask
Before touching a firearm for this project, let’s be sure that it is safe and unloaded. As always, all firearm safety rules apply here, people!
Rifle Camo Patterns and Colors
Finding the right patterns and colors to use for your camouflage paint scheme depends greatly on your goals. If you want your gear to blend into the surroundings, take note of the natural environment of your region. If you live near a very green and wooded area, for example, your scheme will look completely different from someone whose scheme reflects an arid desert area. If you’re surrounded by concrete and steel in a dense urban area, you might want your scheme to reflect that look.
If you’re choosing to paint a scheme just for the fun of it, that’s completely fine too. There are plenty of cool-looking schemes to choose from. Be imaginative and use reference pictures that you find online or in magazines or books as inspiration. If you’re artistic and adventurous, you can freestyle it too; spray a random pattern and make adjustments on the fly.
Spray Paints
Regardless of what pattern you chose, be aware of the colors needed. Your scheme is limited to what color spray paints are available. We recommend using solely flat or matte paints that don’t give off any shine. Although we should add that if you stay within the same base family and choose only flat paints, this narrows your available choices significantly, so plan your scheme accordingly.
For our guide, we selected acrylic-based paints by Rust-Oleum and Krylon. Both are easy to apply, dry quickly and work well layered on top of one another. We also recommend Aervoe enamels and a truly fantastic, long-lasting paint by Brownells called Aluma-Hyde II.
A Word About Layering Paint
The basic rule when applying layers is to use the same type of paint whenever possible. If you go with acrylic paint, then make sure every paint you use is acrylic-based. The same goes for enamel and epoxy-based paints. If there’s a particular shade of paint that you want to use that only comes in a different base, fear not: You can still use it, just with a little more time and care.
The key to developing an attractive, functional rifle camo pattern for your firearm is to layer it in stages with the desired colors.
Let’s say that you put down a layer of enamel and you want to spray acrylic on top of it. Make sure the enamel base layers are completely dry before you apply the acrylic. Not just dry to the touch, which is usually a few hours after spraying, but completely air-dried for a couple of days at least. If you don’t allow the base layers to dry completely and you spray a different paint type on top too soon, the undercoat may chemically react in a way that will really bum you out. When you spray acrylic-based paint on top of enamel that hasn’t sufficiently cured, a common occurrence is that it wrinkles and ends up cracking the paint’s surface (we told you it would bum you out).
Making a Stencil
You can make your own stencil or use objects such as leaves or nets. A stencil can be anything your imagination can dream up. There is no need to use a stencil, but if you do choose to make one, it can be made out of everything from masking tape, paper plates, sheets of paper, or even the flat parts of that annoying, impossible-to-open clamshell plastic packaging (those containers deserve to be cut up).
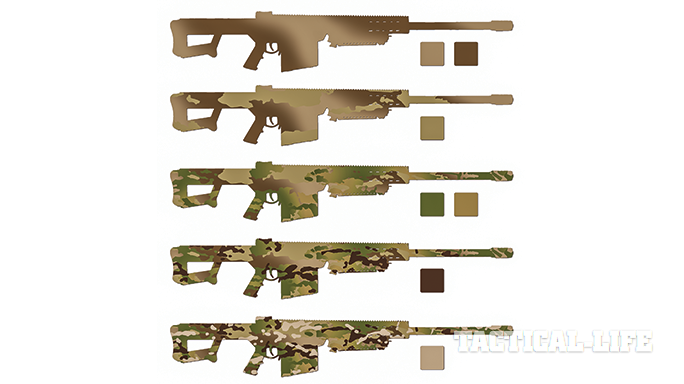
Use a marker to draw shapes onto whatever surface you choose to use as your stencil. In our case, we used letter-sized pieces of cardstock. The kind of scheme you chose dictates what shapes you draw onto the stencil. We decided to make a custom pattern inspired by the colors of a copperhead snake mixed with elements of MultiCam, which we’ll just call “CopperCam.” As a result, we drew random rounded, squiggly shapes and little jellybean-like shapes. Once you’ve finished drawing, you can cut out the shapes with a hobby knife or scissors.
Because our scheme doesn’t require hard definitive lines, we got away with the cardstock. If you want to paint hard lines, try using high-quality painter’s tape. Layer the blue tape down on wax paper, slightly overlapping each strip so that you form a giant solid painter’s tape sheet. Now you can draw and cut out your scheme. You’ll be able to tape the pattern directly onto the surface, creating nice, sharp lines. Pro tip: Layer the wax paper on both sides so that after you cut it, you’ll have twice as many stencils.
Make a Painting Plan
Look through the steps as laid out in this guide and then you can decide exactly which components you want to paint and how you plan to do it.
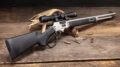
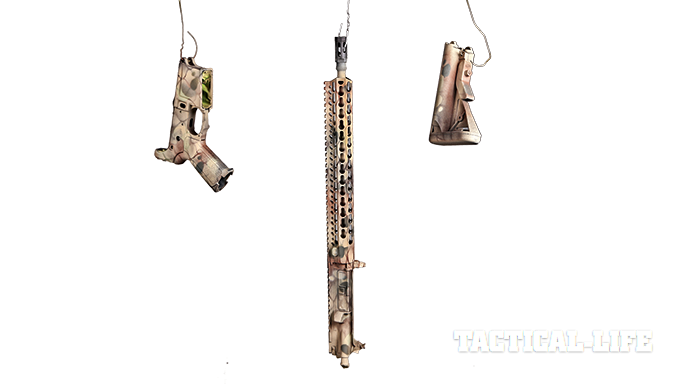
In our example, we painted an AR-15 rifle. There are a few ways you can paint this type of item; either break it down into individual pieces, paint it in complete groups like upper and lower receivers, or do the entire rifle as one piece. The best approach depends on your scheme and which parts you want painted.
Your plan of attack to paint each item depends on the complexity of the piece and your scheme. After painting a couple of things, the planning stage will come easier.
Prepping & Washing
After you figure out how you want to paint your gun, it’s time to prep the parts. Prepping the parts before you paint them is the most important part of this endeavor. Make sure to thoroughly degrease, wash and dry everything you want to paint. Any dust, lint, oil, or grease remnants won’t allow the paint to stick. For really slick surfaces, you might want to lightly scuff them up with some steel wool. The micro-abrasions help the paint adhere better.
Masking
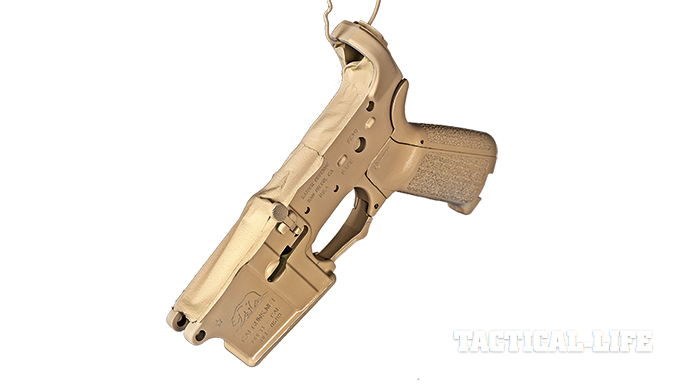
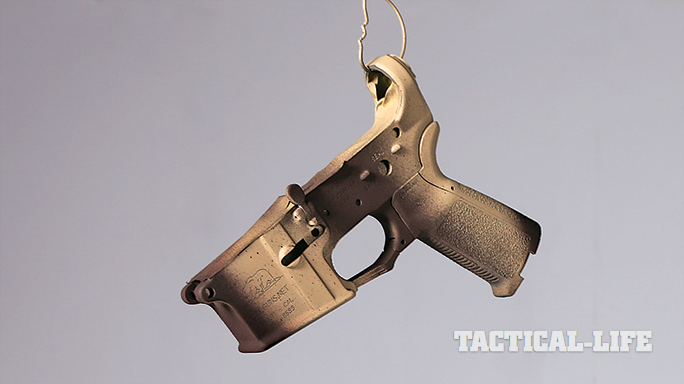
Mask all the parts that you don’t want painted with high-quality masking tape. In our example, we decided in the planning stage to paint this rifle as a combination of parts. We painted the upper and lower receivers and buttstock separately. We left the upper pretty much intact minus accessories, charging handle, and bolt carrier group and stripped the lower, while leaving its grip and trigger guard in place. We masked the upper and lower parts that we wanted to keep free of paint. Take your time and do this carefully. You don’t want to miss any parts, because you might gum up the action with paint.
Getting Ready to Spray
If you enjoy breathing, always wear a respirator face mask and be sure to spray in a well-ventilated area. Surgical-style gloves will keep paint off your hands, and you should also place a tarp or newspaper on the floor to catch any overspray.
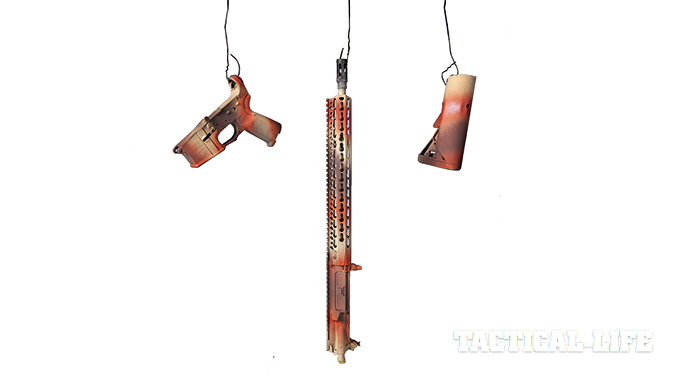
Rattle-canning a three-dimensional object, especially one that has many contours and textures, presents a few challenges. It can be difficult to get every little nook and cranny, and no one wants to hear that “you missed a spot.” While you can place the object on the floor or elevated on a cardboard box, we’ve found that hanging it gives you more angles to properly cover every spot with paint. We always use a clothes rack and wire shirt hangers.
Our DIY Rifle Camo Paint Job in 6 Steps
Step 1
Our CopperCam scheme required us to spray a very light-colored base layer before topping it with four more accent colors. We chose Rust-Oleum’s Camouflage Khaki to start. Because we sprayed a few layers of paint, we kept each layer as thin as possible to avoid the look and feel of globbed-on paint. Make sure to spray lightly, using short two- to three-second bursts, while keeping eight to 12 inches away from the surface. Start spraying in front of the object and stop past the end of it to avoid unwanted paint buildup. Do not focus on one area too long; keep the spray nozzle moving along. These techniques prevent the paint from getting too thick and running and dripping.
Step 2
We accented the base of our scheme with Rust-Oleum Earth Brown. Without the help of a stencil, we sprayed some diagonal lines across the pieces. If you want a more uniform look and broke apart the rifle like we did, you can put it back together before spraying. We sprayed the parts separately, as they hung, to create a random appearance of stripes when reassembled. Again, be very careful to not to ride the nozzle hard.
Step 3
Just like the second layer, we’re still spraying freehand. This time we used Rust-Oleum Red Primer to give the rifle camo a bit of the Copperhead’s rusty tinge.
Step 4
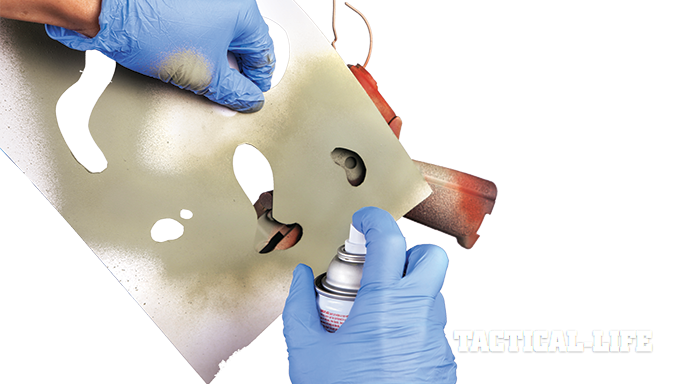
This time, we used the stencils that we cut out of our cardstock. You can vary the distance between the stencil and the object depending on how hard you want your edges. For sharper edges, hold the stencil close to the surface or even place it directly on the surface when painting. Be sure that the previous coat is dry before doing so. For softer edges, hold the stencil farther away. Practice this on a piece of newspaper or cardboard beforehand. Here, we applied two colors, Rust-Oleum Army Green (the lighter shade) and Krylon Olive, both from their respective Camouflage lines.
Step 5
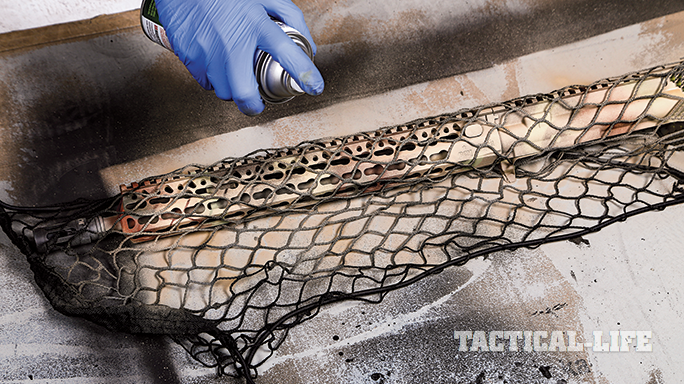
To break up the solid blocks of color and emulate the scales of a snake, we used a car trunk cargo net as a stencil. We transferred the parts to the floor for painting so the net “hugged” the surface better. Here, we used Rust-Oleum Sand spray.
Step 6
To soften up the look of our rifle camo, we lightly misted the parts with the base color paint from about 18 inches away. We wanted a really subtle mist of paint here. Before you do this step, be sure that your nozzle is clean to avoid splotchy paint. To protect the finish, we recommend hitting it with a final, matte clear coat. Sure, the paint will eventually rub off, chip and scratch, but some paint protection is better than none. After everything dried, we reassembled the rifle.